Software
You will need the following software:
- Camera for OBS Studio is the iOS app that you need to purchase ($15.99 USD) and install on your iPhone. This is a one-time purchase and is the only paid software that will be used in this guide.
- OBS Studio is the desktop software that you will need to install on your Windows, Mac or Linux. It’s free and open source.
- 2 plugins that need to be downloaded and installed after OBS Studio: iOS Camera Plugin for OBS Studio and obs-mac-virtualcam. Don’t worry, they are easy to install.
Windows vs. Mac
Even though this approach works across Windows and Mac, the examples and screenshots used in this guide are based on macOS. For Windows machines, there is no need to download the virtual cam plugin because the capability is now built into OBS Studio 26.0
The Steps
- Download and install the software mentioned above
- Connect your iPhone to your computer via lighting cable
- Open Camera for OBS Studio on your iPhone and follow the prompts to accept camera and microphone permissions
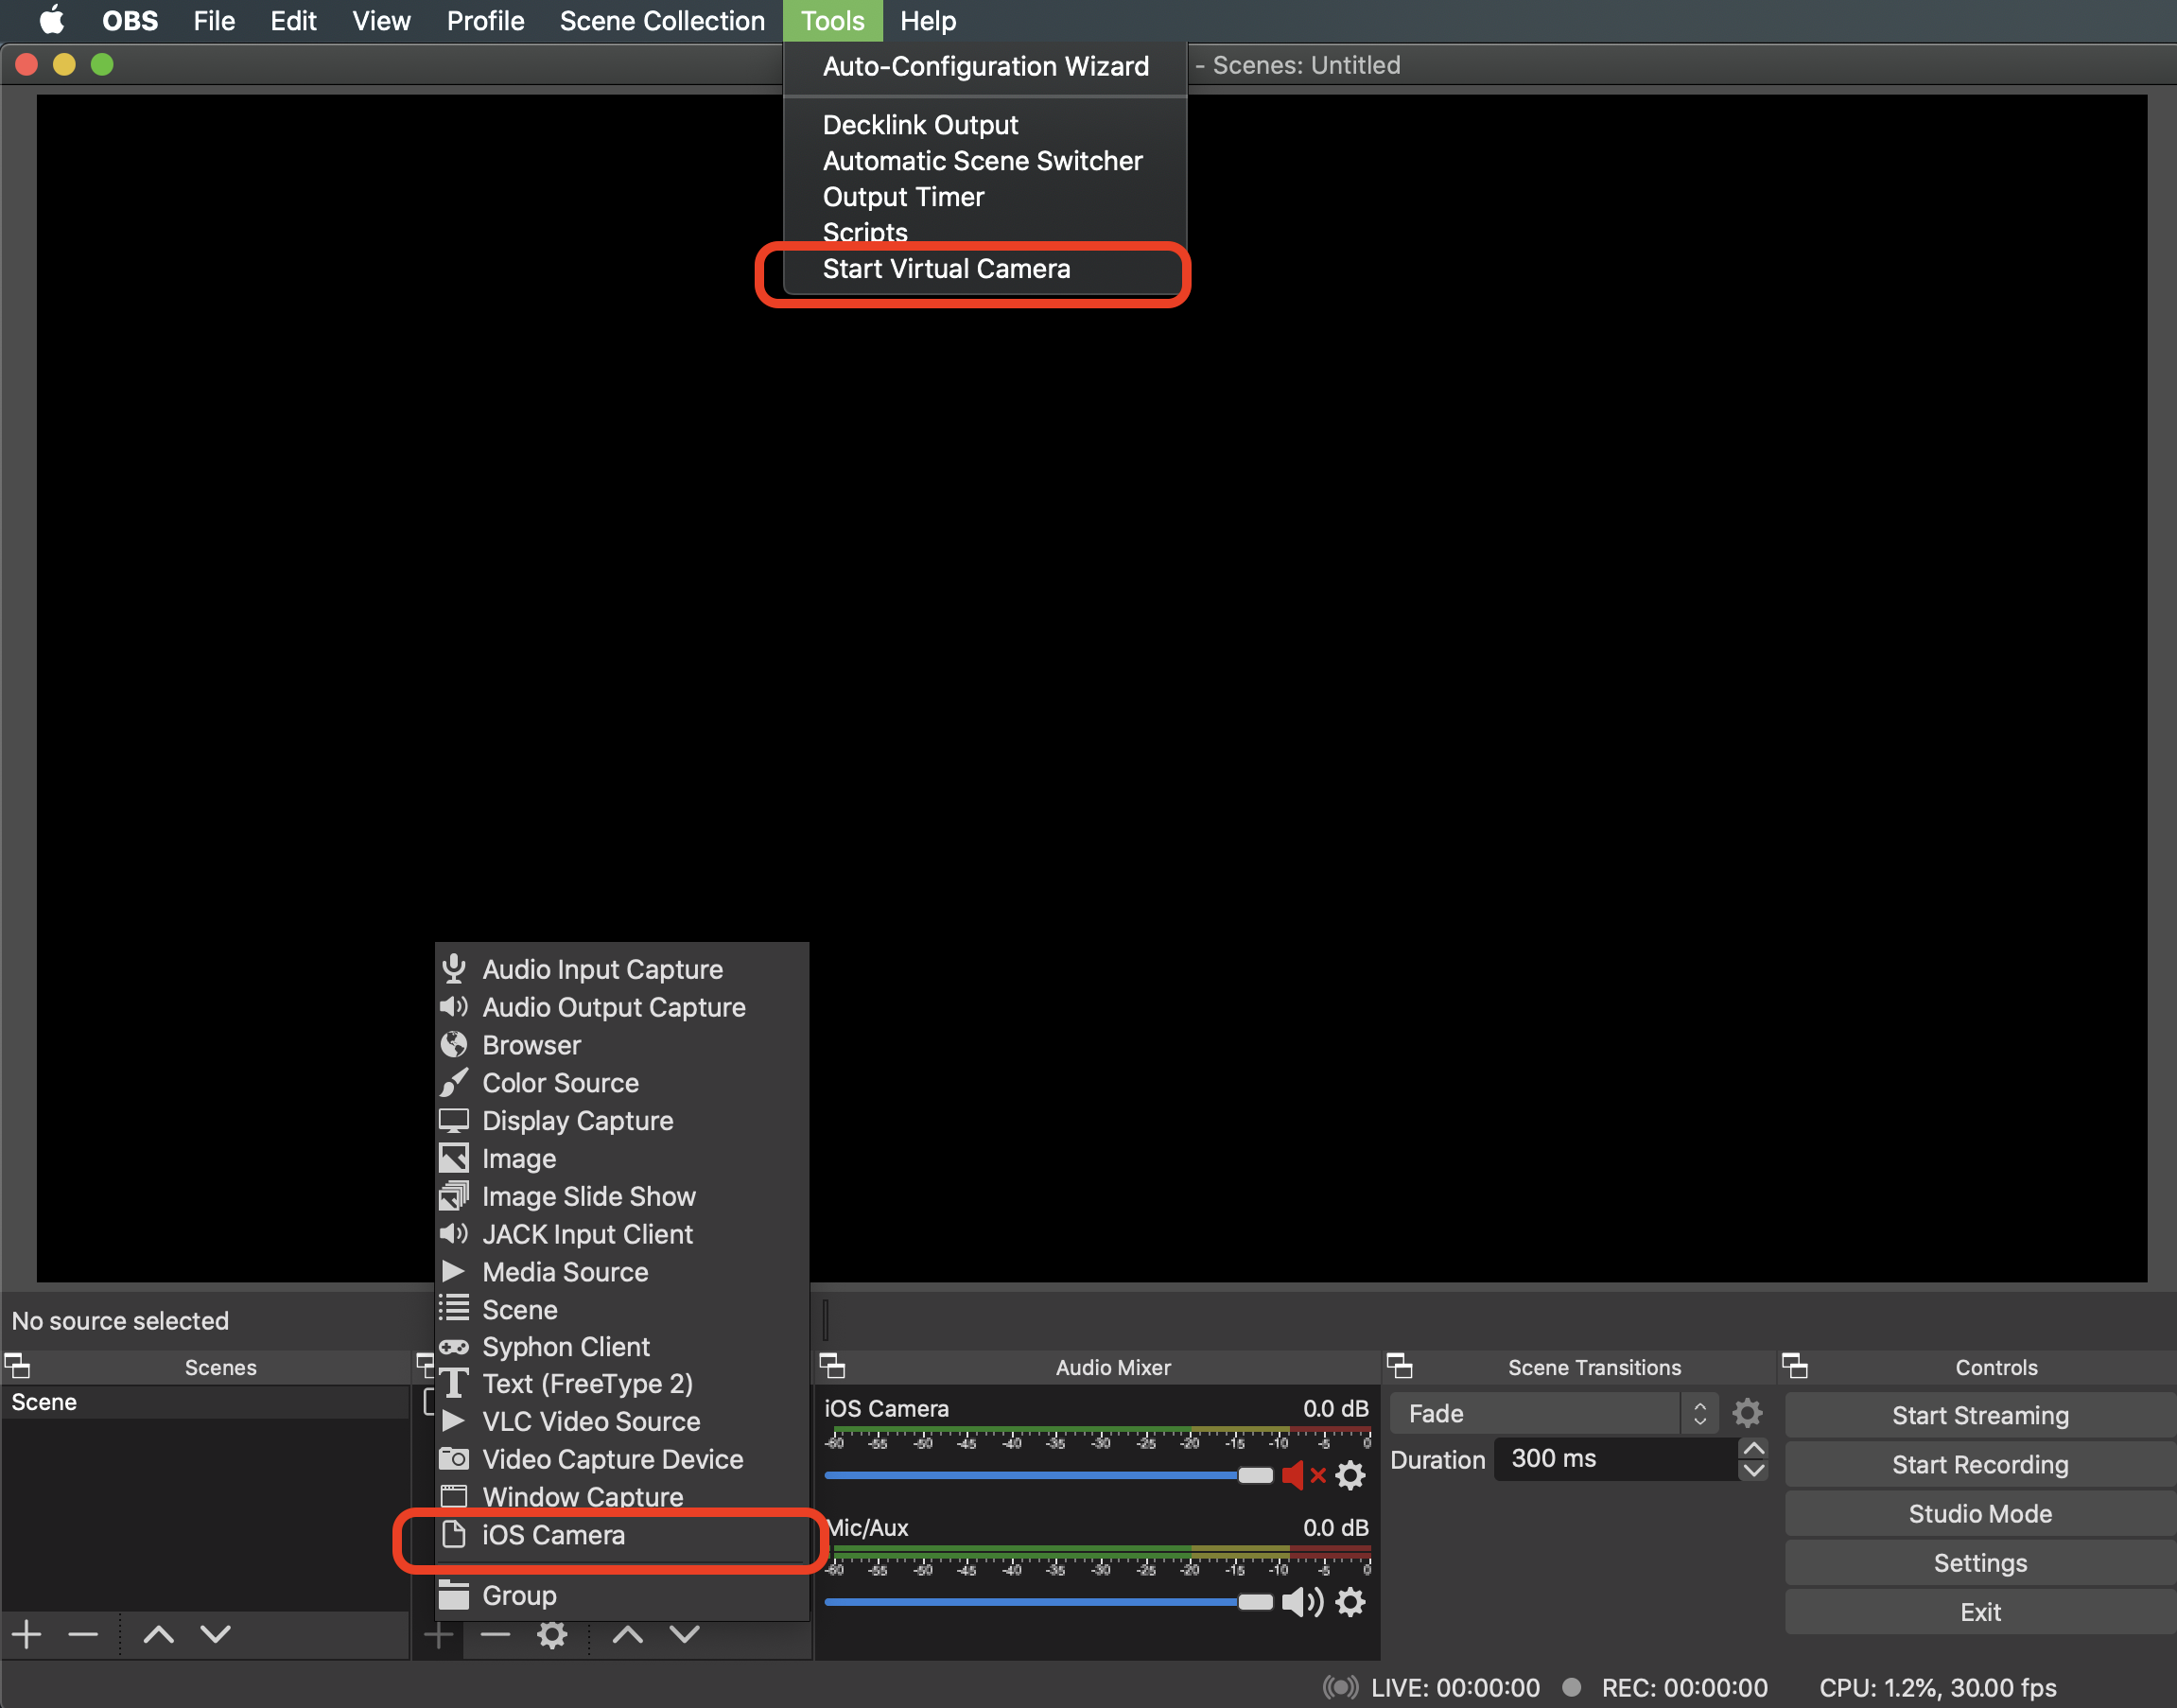
- Open OBS Studio on your computer. Add iOS Camera as the source. You should immediately see a live stream of you iPhone camera in OBS Studio
- In OBS Studio, select Tools -> Start Virtual Camera. If you don’t see iOS Camera as a source or Start Virtual Camera option, make sure you have correctly installed the 2 plugins mentioned above

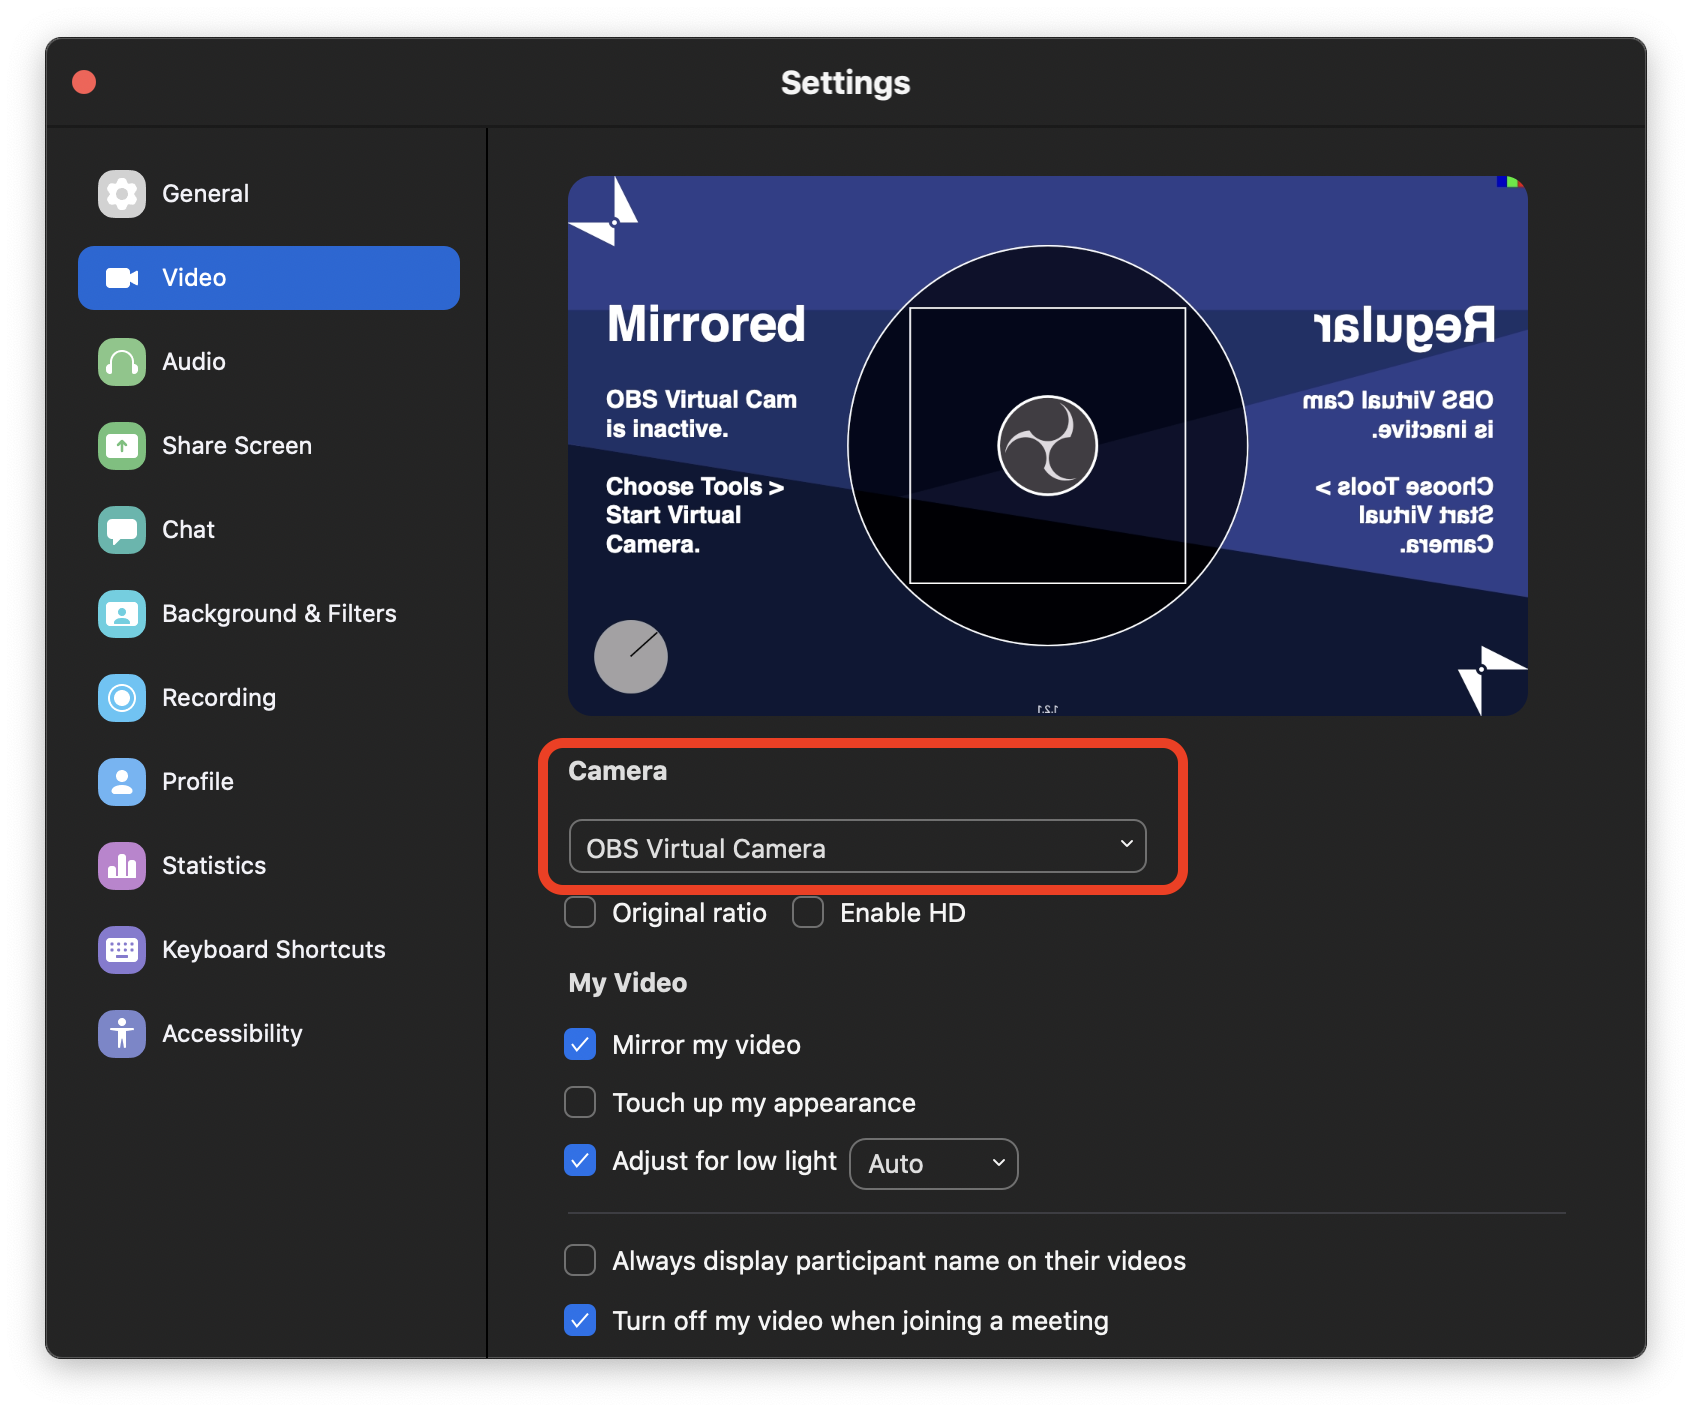
- Open Zoom -> Settings -> Video -> Select OBS Virtual Camera from Camera dropdown list

- If you see iPhone’s camera is being captured in Zoom, you are good to go
Alternatives
Camera for OBS Studio is definitely not the cheapest option available. But I find it’s the best option that works for me without additional webcam hardware. All alternatives require downloading an iOS app and a desktop counterpart software. Here are some free and paid alternatives that may or may not work better: